Showing posts with label Sandwich. Show all posts

Thursday, January 16, 2020

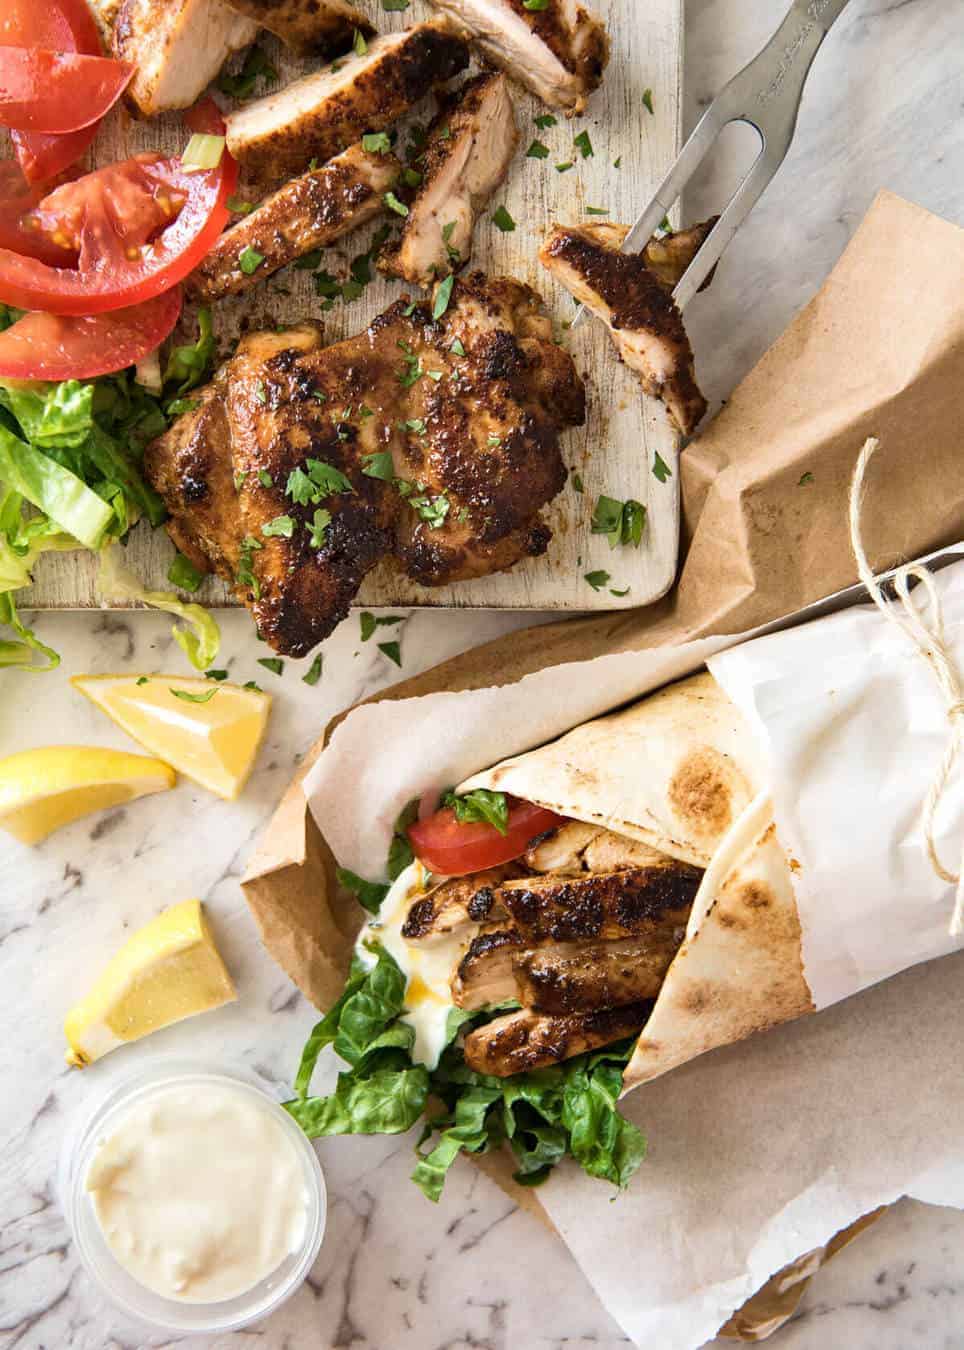
Chicken Shawarma

The flavour of this Chicken Shawarma marinade is absolutely incredible, yet made with just a handful of everyday spices. www.recipetineats.com
There is a great Middle Eastern restaurant in Ann Arbor that I love. But what I love even more is enjoying dinner at my own house. And now, if you're lucky, I might invite you over for some delicious Chicken Shawarma.

Ingredients
2lb  chicken thigh fillets , skinless and boneless

Marinade
1 large garlic clove , minced
1 tbsp ground coriander
1 tbsp ground cumin
1 tbsp ground cardamon
1 tsp ground cayenne pepper (reduce to 1/2 tsp to make it not spicy)
2 tsp smoked paprika
2 tsp salt
Black pepper
2 tbsp lemon juice
3 tbsp olive oil

Yogurt Sauce
1 cup Greek yoghurt
1 clove garlic , crushed
1 tsp cumin
  • Squeeze of lemon juice
    Salt and pepper
     
  • Serve with flatbreads, sliced lettuce, tomato slices, hummus or tzatziki sauce, or yogurt sauce, recipe below.

    Instructions

    Combine the marinade ingredients in a large ziplock bag (or bowl). Add the chicken and use your hands to make sure each piece is coated. If using a ziplock bag, I find it convenient to close the bag then massage the bag to disperse the rub all over each chicken piece.
    Marinate overnight or up to 24 hours.
    Combine the Yoghurt Sauce ingredients in a bowl and mix. Cover and put in the fridge until required (it will last for 3 days in the fridge).
    Heat grill/BBQ (or large heavy based pan on stove) on medium high. You should not need to oil it because the marinade has oil in it and also thigh fillets have fat. But if you are worried then oil your hotplate/grill. (See notes for baking)
    Place chicken on the grill and cook the first side for 4 to 5 minutes until nicely charred, then turn and cook the other side for 3 to 4 minutes (the 2nd side takes less time).
    Remove chicken from the grill and cover loosely with foil. Set aside to rest for 5 minutes.
  • From recipetineats.com
  • Friday, March 13, 2015

    Chicken & Gruyere Turnovers


    I have not made these in a long time but enjoyed them immensely every time I did. They are not incredibly healthy, so it's more of a once in awhile treat type of food... but so worth it. I generally cut the puff pastry into 4 pieces (making 4 squares instead of 2 rectangles) and then fold them corner to corner to make triangular shaped sandwiches. This was all in an effort to make them easier for Max's little hands to hold them (when Max had super little hands). Note, this could also make it easier to eat just a triangle and not splurge too much on these. Once you have assembled these you can wrap them in saran wrap & tin foil and stick them in the freezer. Then just let them defrost for 10-15 minutes and tack on some extra baking time.


    Hands-On Time:15 minutes
    Total Time: 40 minutes
    Serves 4

    Ingredients
    1 1/2 cups shredded rotisserie chicken
    1 1/2 cups grated Gruyère
    1 cup frozen peas
    2 sheets (one 17.25-ounce package) frozen puff pastry, thawed
    1 large egg, beaten
    1/4 cup Dijon mustard


    Directions

    1. Heat oven to 400° F. In a medium bowl, combine the chicken, Gruyère, and peas.
    2. Cut the 2 sheets of puff pastry in half to form 4 rectangles and place on a baking sheet. 
    3. Dividing evenly, top half of each rectangle with the chicken mixture. Fold over and seal the turnovers; brush the tops with the egg. 
    4. Bake until golden, 20 to 25 minutes. 
    5. Serve with the mustard.
    Recipe and photo courtesy of realsimple.com

    Thursday, March 12, 2015

    Really Awesome Black Bean Burgers


    I went in search of this recipe to solve the problem of high sodium content found in the Morningstar veggie burgers I often eat for breakfast. That's not what I found (the original recipe for this is about 4 times the calories of the Morningstar ones and take a long time to cook) but what I found instead was an easily freezable, individual serving type of dinner for the nights I'm serving the kids something I am uninterested in (or not allowing myself to) eat: macaroni & cheese... chicken nuggets... etc.

    Given the high calorie count in the original recipe (and hoping to use easier to find ingredients) I made a fair number of modifications. As such, I've provided a link to the original recipe for those interested in seeing it and reading the explanation of how the author came to this combo of ingredients to make a seriously delicious black bean burger.

    http://www.seriouseats.com/recipes/2014/03/the-best-black-bean-burger-recipe.html
     

    Ingredients

    • 2 (15 ounce) cans black beans, rinsed and drained
    • 4 tablespoons vegetable oil, divided
    • 1 medium onion, finely chopped (about 1 cup)
    • 1 large red pepper, finely chopped (about 1 cup)
    • 3 medium cloves garlic, minced
    • 1 can roasted green chilis
    • 1/2 cup roasted cashews
    • 1/2 cup finely crumbled feta
    • 2 whole eggs
    • 3/4 cup panko bread crumbs
    • Cheese as desired, such as pepper jack, cheddar, muenster, or Swiss (optional)
    • 6 to 8 hearty hamburger buns, toasted (or thin sandwich buns...I find the burgers aren't quite hefty enough to warrant a full bun)

    Procedures

    1. Adjust oven rack to center position and preheat oven to 350°F. Spread black beans in a single layer on a foil-lined rimmed baking sheet. Place in oven and roast until beans are mostly split open and outer skins are beginning to get crunchy, about 20 minutes. Remove from oven and allow to cool slightly.
    2. While beans roast, heat 2 tablespoons oil in a medium skillet over medium-high heat until shimmering. Add onion and red pepper and cook, stirring frequently, until softened, about 5 minutes. Add garlic and cook, stirring constantly, until fragrant, about 2 minutes. Add green chilis and cook, stirring, until fragrant, about 30 seconds. Transfer mixture to a large bowl.
    3. Place cashews in the bowl of a food processor and pulse until chopped into pieces no larger than 1/3-inch, about 12 short pulses. Add to bowl with onions and peppers.
    4. When beans are slightly cooled, transfer to food processor. Add cheese. Pulse until beans are roughly chopped (the largest pieces should be about 1/3 of a full bean in size). Transfer to bowl with onion/pepper mixture. Add eggs, and bread crumbs and season with salt and pepper. Fold together gently but thoroughly with hands. Patty mixture can be stored in an airtight container in the refrigerator for up to three days at this stage. Here, I usually place the patties between sheets of parchment paper and freeze them.
    5. To cook on the grill: Heat grill to medium-high setting and preheat. Form bean mixture into 6 to 8 patties as wide as your burger buns and brush top sides with oil. Place on hot side of grill oiled-side down and cook without moving until first side is well browned, 3 to 5 minutes. Brush tops of burgers with oil. Carefully flip and continue cooking until second side is browned, 3 to 5 minutes longer, topping with cheese if desired.
    6. To cook indoors: Form bean mixture into 6 to 8 patties as wide as your burger buns. Heat 1 tablespoon oil in a large non-stick or cast iron skillet over medium heat until shimmering. Add 4 patties and cook, swirling pan occasionally, until well browned and crisp on first side, about 5 minutes. Carefully flip and cook until second side is browned, about 5 minutes longer, adding cheese if desired. If cooking more than 4 burgers, cook in batches, keeping cooked burgers on a rack set in a rimmed baking sheet in a 200°F oven while second batch cooks.
    7. OR To cook indoors:: Preheat oven to 425°F and cook on parchment paper for 30 minutes. (I tried pan frying once but they fell apart too easily and then I had another pan to clean. Now the oven is the only way I cook these. It takes awhile, but is completely hands off)
    8. Spread top and bottom buns with chipotle mayonnaise or other condiments as desired. Add toppings to top or bottom bun as desired. Place patties on bottom buns, close burgers, and serve immediately.

    Sunday, March 2, 2014

    Baked Falafel with Lemon Tahini Sauce

    falafel, souvlaki, BLT 050
    serves 2
    Falafel
    15oz can chickpeas, drained
    2 tablespoons flour
    2 tablespoons finely chopped parsley
    2 large cloves garlic, minced
    1 teaspoon ground cumin
    1 teaspoon ground coriander
    ½ teaspoon chili powder
    ¼ teaspoon salt
    ¼ teaspoon pepper
    Lemon Tahini Sauce
    2 tablespoons tahini paste
    zest and juice of 1 lemon
    Remaining Ingredients:
    ½ cup crumbled feta cheese
    2 pita breads (5” diameter)
    ½ cup thinly sliced red onion
    1 cup chopped tomatoes
    1 cup chopped green leaf lettuce
    Preheat the oven to 400 degrees F. Combine all falafel ingredients in a food processor and pulse until well blended. Scoop the bean mixture into a bowl and shape into 8 equal sized patties. Place on a greased baking sheet, brush each with olive oil and bake for 20 minutes.
    Whisk the tahini, lemon juice, and zest in a small bowl.
    Divide the hot falafel among the two warmed pita breads and top with chopped lettuce, tomato, thinly sliced red onion, crumbled feta, and the lemon-tahini sauce.
    Nutrition info for 1 serving (1/2 of entire recipe):
    Calories: 538, Fat: 18.7g, Cholesterol: 33.4mg, Carb: 73.1g, Fiber: 10.4g, Sugars: 0.1g, Protein: 21.2g

    Monday, October 21, 2013

    Curried Chicken Salad

    Curried Chicken Salad with Apples and Raisins RecipeThe original photo that went along with this recipe (not shown here) was so unappealing I nearly didn't make it, just for that. However, my mother's admission that the sauce was so tasty she considered using it on her toothbrush left me intrigued. This recipe is amazing! In the interest of saving time, I use my food processor to "dice" the chicken. Amazing lunch. I eat it by itself but could be eaten on crackers or bread.

    Ingredients:

    6 slices bacon
    3 cups diced cooked chicken breast meat
    1/2 cup chopped celery
    1 cup chopped cucumber (original recipe calls for grapes)
    1 cup mayonnaise
    2 tablespoons red onion, minced (I leave this out)
    1 teaspoon lemon juice
    1/2 teaspoon Worcestershire sauce
    1/2 teaspoon curry powder (or more)
    salt and pepper to taste

    Directions:
    1. Place bacon in a large, deep skillet. Cook over medium high heat until evenly brown. Crumble and set aside.
    2. In a large bowl, combine bacon, chicken, celery, and cucumber.
    3. Prepare the dressing in a small bowl by whisking together the mayonnaise, onion, lemon juice, Worcestershire sauce, curry and salt and pepper. Pour over salad and toss well.


    Adapted from Allrecipes.com

    Sunday, July 28, 2013

    Portobello and Fried Egg Panino


    Ingredients
    • 1 slice whole grain bread
    • 1 garlic clove, halved (optional)
    • 1 tablespoon extra virgin olive oil
    • 1 medium portobello mushroom (stuffing size), or 2 or 3 white or cremini mushrooms, sliced about 1/2 inch thick
    • 1 egg
    • Salt and freshly ground pepper
    • Chopped fresh herbs, such as tarragon, marjoram or parsley (optional)


    Directions

    1. Toast the bread while you cook the mushrooms and the egg. When the bread is lightly toasted, rub with a cut clove of garlic if you wish.

    2. (To reduce the oil needed I have also just cooked the portobellos on the grill) Heat 2 teaspoons of the olive oil in a medium-size nonstick skillet over medium-high heat. Add the mushrooms, and cook on one side without moving them around until they begin to sweat, three to five minutes. Shake the pan a little and continue to cook until lightly colored, then turn over and cook on the other side until the mushrooms are tender and moist. Season to taste with salt and pepper. Remove from the heat, and place on top of the toast in a single layer.

    3. Heat the remaining teaspoon of olive oil in the hot pan over medium heat, and break in the egg. Fry until the white is set, about four minutes. Season with salt and pepper, and carefully place on top of the mushrooms. Sprinkle with herbs if desired, and eat.


    Photo and recipe from NY Times

    Tuesday, July 16, 2013

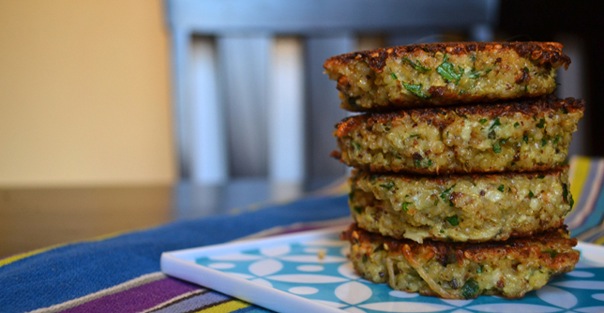
    Basil Quinoa Cakes

    Photo from Greatist.com

    I stumbled on this recipe while searching for an old quinoa cake recipe. The "basil" caught my eye because... for goodness's sake... who doesn't love basil?!? Quinoa is one of the slightly out there foods to which Lauren introduced me, giving it a special place in my heart and kitchen.  The original recipe called for frying them in a few tablespoon of oil. I'm working really hard at eating better right now so I opted to bake them (I also fried a few to see the difference and was VERY surprised at how well the baked ones came out. To form the patties I used a pancake shaper (very technical cooking term - see right) because then I could pack the quinoa mixture and form a nice round patty which will make them less likely to fall apart. These freeze great, so double or triple the batch. And it really does require that many eggs... I tried with fewer and didn't get the right consistency.

    They're great plain or dipped in sour cream or hummus. Later this week Amanda and I will be eating them in pita pockets with hummus, cucumber, and sprouts.

    Ingredients:
     2 1/2 cups cooked quinoa
    4 eggs, beaten
    1/2 teaspoons sea salt
    1/4 cup chopped fresh basil
    1/2 large white or yellow onion, finely chopped
    1/3 cup parmesan cheese, grated
    3 cloves garlic, finely chopped
    2/3 cup bread crumbs (plus a few extra tablespoons if needed)
    Directions:
    1. Combine cooked quinoa, beaten eggs, and salt together in a medium bowl. Add basil, cheese, garlic, and onion, and stir until evenly mixed.
    2. Add bread crumbs and let stand so crumbs absorb some moisture. The mixture should be easily formed into balls without falling apart. If needed, add a couple tablespoons of breadcrumbs and let stand a few minutes more.
    3. Form patties by hand or with pancake shaper device and place on parchment paper on a cookie sheet. Bake at 400 F for 20 minutes.
    Modified from Greatist.com

    Wednesday, May 22, 2013

    Turkey, Mozzarella & Basil Wrap


    I had to reach way back into the NCC history to find this one. First tried by Jenny she had these comments:

    "I made the Turkey, Mozzarella and Basil Wraps for our lunches today.

    The recipe doesn't say what kind of turkey to use, so I opted for the healthier version and roasted a turkey breast to bypass all the sodium. I also substituted whole milk mozzarella because that's what I keep on hand. Sensing the base recipe to be somewhat bland and dry, I added some garlic and my basil to a little bit of mayonnaise. Oh, and I also added a slice of avocado.

    With what we now considered to be worthy wraps, Ted and I left for work feeling very excited for our lunches.

    Ted reported back that it indeed was yummy, but lacked just a pinch of salt.

    I, too, thought it lacked that pinch, but I also found it too dry for my taste. I remain happy with the amount of mayo used, but think a tomato slice might have solved the moisture problem.

    This recipe is a good start, but think with a slight makeover it could make a great wrap and still be healthy. As I have a bountiful amount of basil in my garden, I will do this wrap again with my above noted additions along with a slice of red onions and that tomato."

    I made this for dinner last night with some of Jenny's suggestions and LOVED it.

    Ingredients
    • 2 small(6-inch) whole-grain tortillas
    • 3 ounces turkey
    • 1 1-ounce slice part-skim mozzarella cheese
    • 1/4 cup chopped fresh basil
    • 2 slices tomato
    • 1/2 tsp garlic mixed with 1 Tbs mayonaisse and a dash of salt
    • Optional additions: avocado, red onion

    Preparation
    1. Fill tortillas, wrap, and enjoy.
    Modified from Recipes.com